Setting up Your Ninox Hammock
Setting up Your Ninox Hammock
- Before you set up remove the hammock from the bag and locate one of your suspension anchors. Now run this through the CD Port end to lock the bag onto your hammock for set up. This allows the bag to stay on your Ninox Hammock.
- Find two Trees 10-15 ft apart
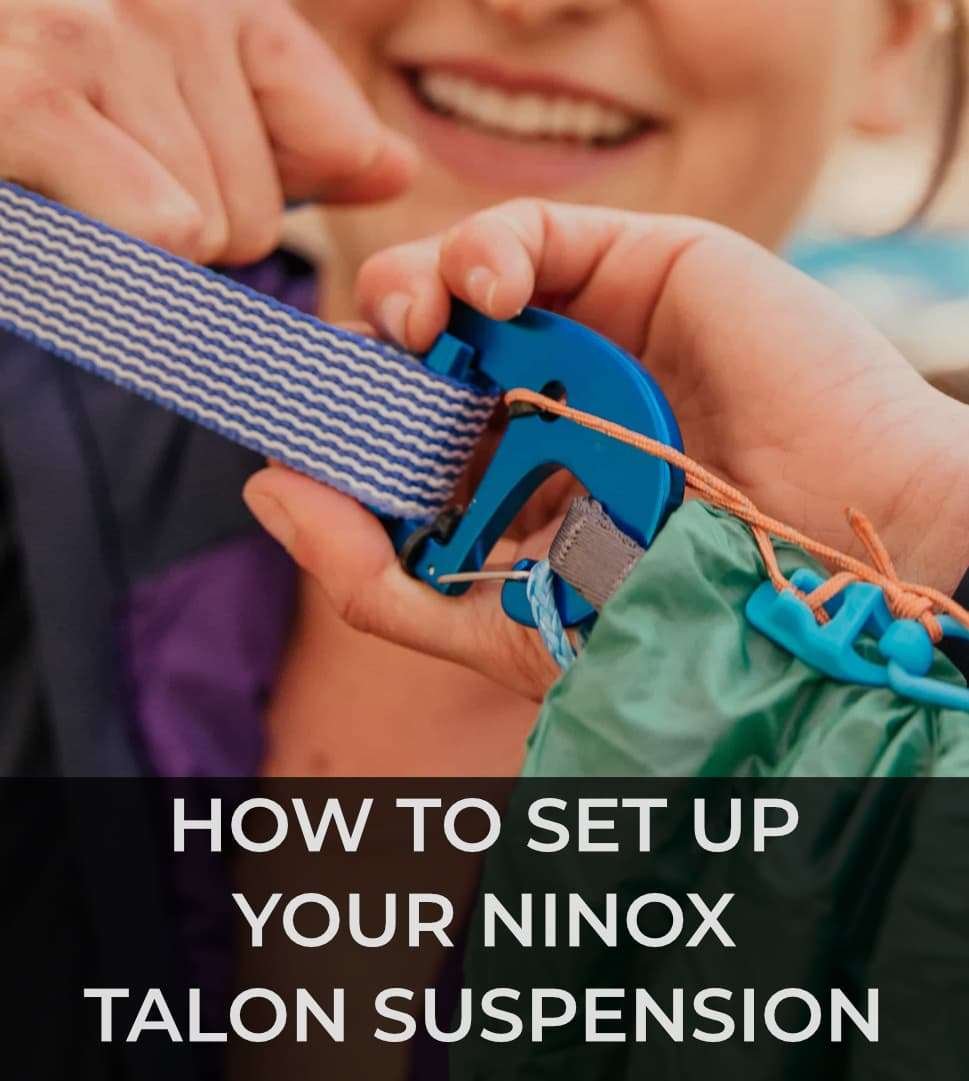
- Wrap your Talon Suspension around each tree and back through it's eye loop end
- Adjust the suspension an arms length up the tree (the further your trees are apart the higher your suspension needs to be)
- Clip the CD Port End of Your Ninox Hammock to one Talon
- Walk Your Ninox Hammock over to the next tree & clip into your second Talon (your hammock should never touch the ground)
- Confirm your Suspension line is in place and not twisted then tighten your suspension evenly on each suspension line for a perfect hang so that your Ninox is centered between both trees (don't tighten too tight)
- Press firmly on the hammock for a safety check and hop in for a test! (optimal hang is 18inches off the ground when load is applied)
- Now you can locate your elastic cords with green hooks and connect them to the Tie Outs on the insect shield then run them to a stake or wait until your fly is set up and run them to the corners of the Ninox Fly Wing Tips. (stakes are sold separately or with the Ninox Fly)
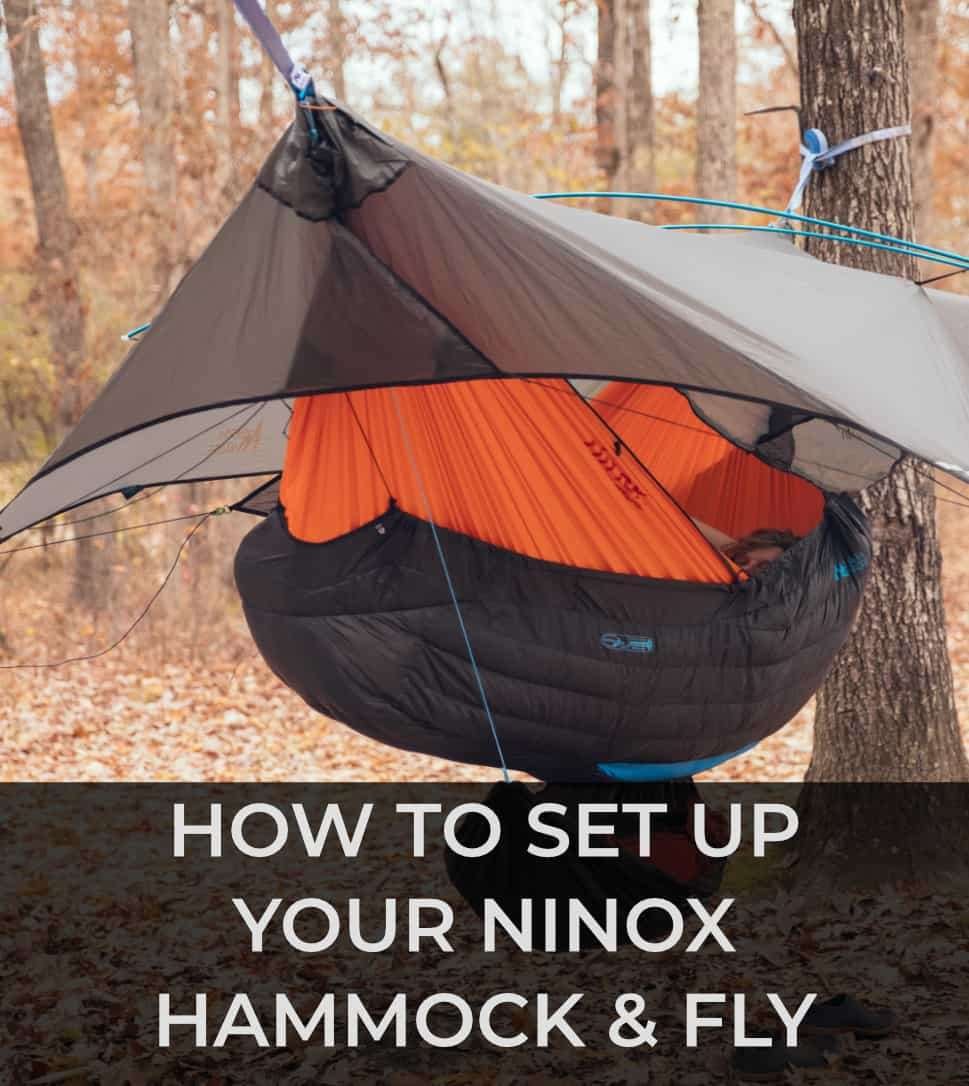
Adding your Ninox Rain Fly + Pole Kit + Gear Stash
Adding your Ninox Rain Fly + Pole Kit + Gear Stash
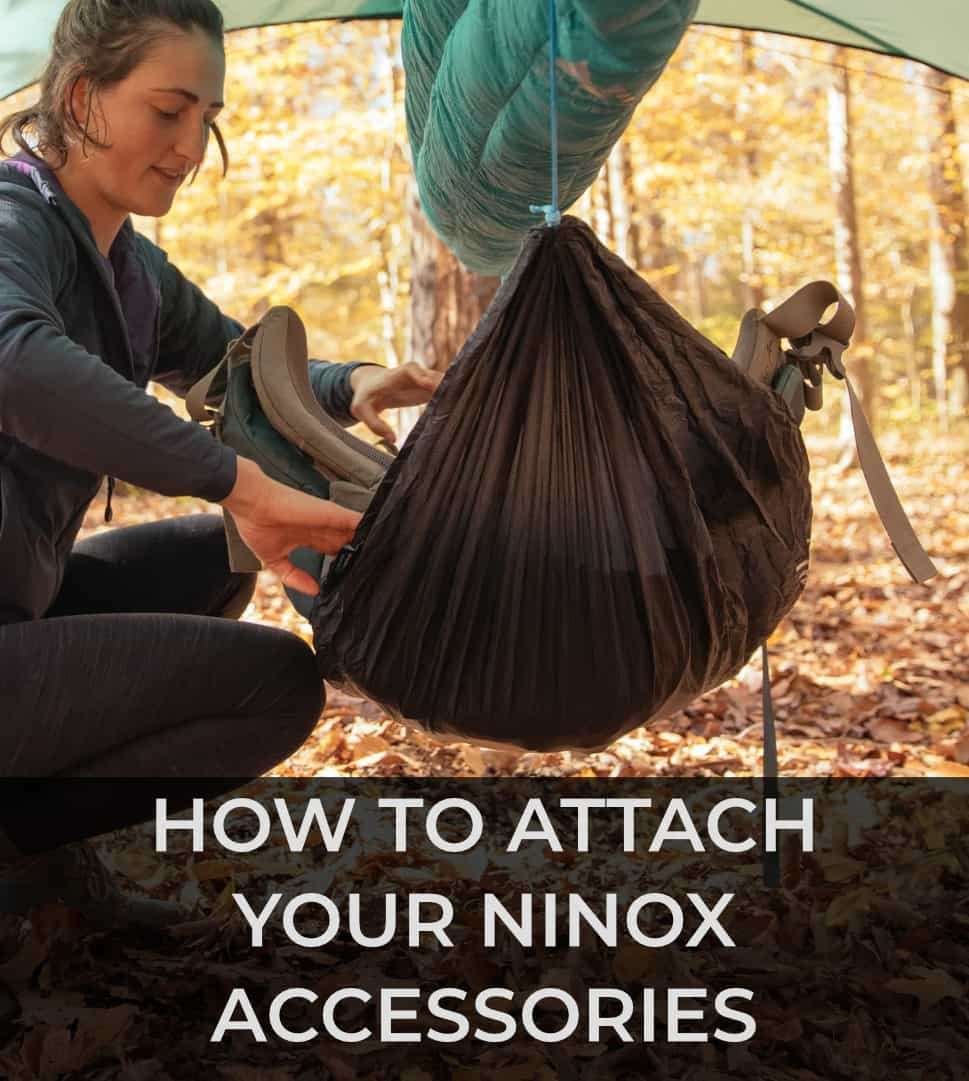
- Clip your one line of your gear stash into the Talon Suspension carabiner and repeat on the 2nd side. (adjust to your desired height)
- Remove your Ninox Rain Fly from its storage bag
- Drape over the Ninox Hammock Ridgeline evenly.
- Unclip your Ninox Hammock anchor point from the Talon Suspension and run it up and through the closure sleeve on your Ninox Fly
- Now you can clip the closure sleeve and cinch it closed for 100% protection from the rain.
- Repeat on the 2nd side
- Remove the Skyhook from its designed pocket and run the Skyhook either through the open spacer on the Talon Suspension and hook back to the blue D-ring on the Ninox Fly or around the trees you are suspending from and back to the blue D-ring on the Ninox Fly
- Now tension the guy line until your Ninox Rain Fly is taught
- Repeat on the 2nd Side
- Next is to stake out your guy lines - remove the stakes from their storage compartment on the Ninox Fly Storage Bag
- Find the a Wing Tips on the Ninox Fly then remove that guyline from its designed pocket
- Walk the guyline out as far as possible and directly out from its triangular Wing Tip then take a step toward the tree you are suspending from and place your stake in the ground. Now place the eye loop of your guyline to the stake
- Repeat for the remaining 3 wing tips (make sure your stakes are faces the correct way where the tension is caught on the lip of the stake)
- You can now tension the guylines at the Wing Tips to create a taught fly
- Add your pole kit poles to the top of the fly by popping the rounded end of the poles into the clear buckles on top of the Ninox Fly. (there is a tube in this bag but it is for repairs not normal set ups)
- Repeat for your second pole (these run parallel and do not cross each other)
- Now you can locate your elastic cords with green hooks and hook them to the Quad Tie Outs located on the Ninox Hammock Insect Shield and to the corners of the Ninox Fly Wing Tips where they connect to their green D-rings. Now Tension these lines to pull the insect shield away from your face.
- Your Ninox Fly Doors (located under the Closure Sleeves on the sides of your hammock can be open or closed depending on needed air flow / protection either by running to the opposite side stakes or the opposite side ends on the fly

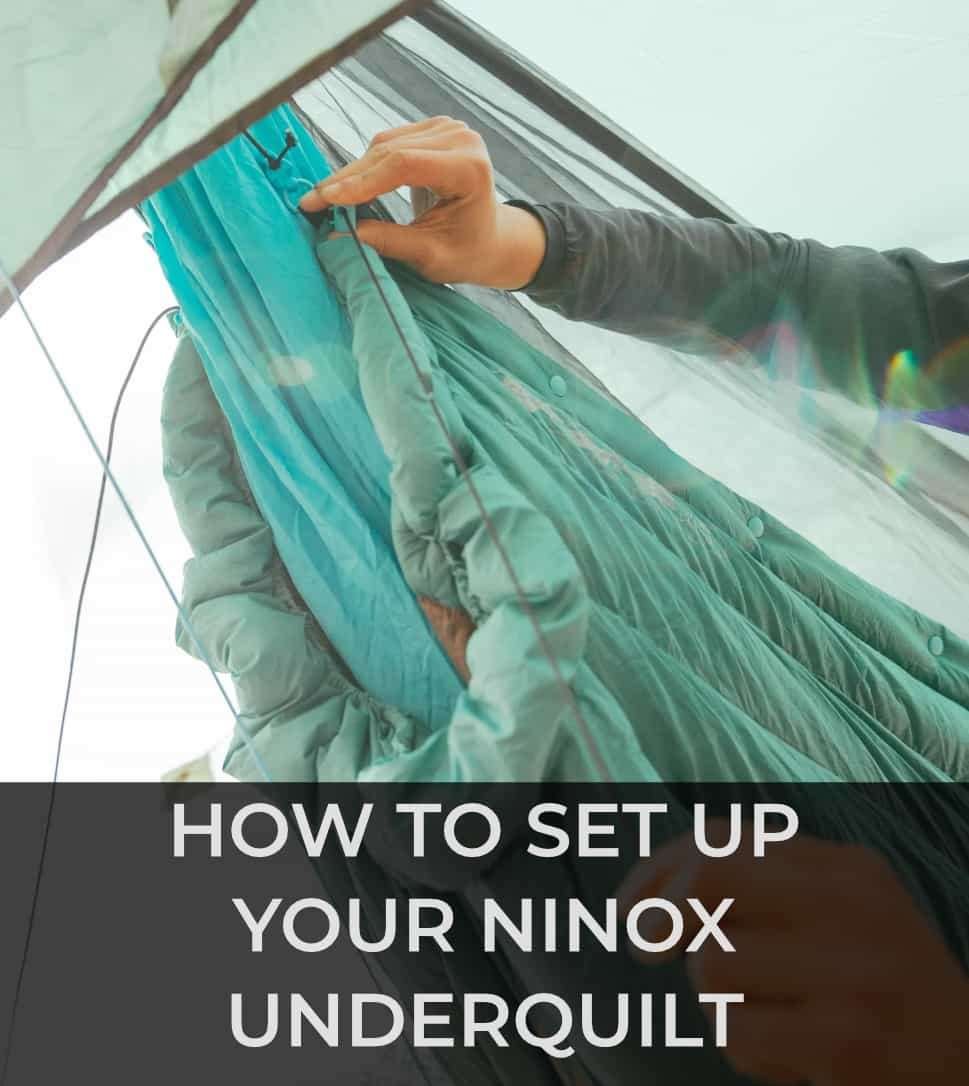
Attaching a Puffle UnderQuilt for Insulation
- Locate the UnderQuilt Suspension Kit in it's pocket of the Puffle compression bag.
- Now you connect the blue hooks to each width corner of the Puffle at the blue D-Rings.
- Next you will run the elastic cord up through the closure sleeve and clip into the Talon Suspension carabiner.
- Repeat on the opposite side.
- Your Puffle should be lengthwise under the body of your hammock now.
- Place your hammock inside the hanging UnderQuilt now.
- Once you get inside your hammock then position the Puffle UnderQuilt with your body on your diagonal lay.
Attaching an Inferno UnderQuilt for Insulation
- Identify which end and corner of the hammock will be your head or foot end first.
- Now locate your head end of the Inferno by its head or foot tabs.
- At this end find the elastic attachment cord and hook on your Inferno and clip it into the Blue D-ring located on the Ninox Hammock body near the zipper halfway between the center logo and the side of the hammock.
- Next you can clip the black hook from the hammock body to the black elastic loop on the Inferno UnderQuilt.
- Now you can walk around the hammock to the opposite end and opposite side of the hammock and repeat that step for the foot end.
- Leave the two remaining connection loops on the Inferno that are on the opposite ends of your diagonal lay NOT connected for the best fit to your diagonal lay.
- Now you can connect the T Dog Bone connector at the center of your Inferno to the black D-ring at the center of the hammock body near it's Sierra Madre logo.
- Now you can tension the Ends and the Snug Strip on the length end of your hammock.

Setting up Your Ninox Hammock
- Before you set up remove the hammock from the bag and locate one of your suspension anchors. Now run this through the CD Port end to lock the bag onto your hammock for set up. This allows the bag to stay on your Ninox Hammock.
- Find two Trees 10-15 ft apart
- Wrap your Talon Suspension around each tree and back through it's eye loop end
- Adjust the suspension an arms length up the tree (the further your trees are apart the higher your suspension needs to be)
- Clip the CD Port End of Your Ninox Hammock to one Talon
- Walk Your Ninox Hammock over to the next tree & clip into your second Talon (your hammock should never touch the ground)
- Confirm your Suspension line is in place and not twisted then tighten your suspension evenly on each suspension line for a perfect hang so that your Ninox is centered between both trees (don't tighten too tight)
- Press firmly on the hammock for a safety check and hop in for a test! (optimal hang is 18inches off the ground when load is applied)

Attaching your Gearstash
- Clip your one line of your gear stash into the Talon Suspension carabiner and repeat on the 2nd side. (adjust to your desired height)
Attaching your Winter Top Shield
- First remove the Insect Shield by running back each of the 4 zippers on the insect shield until they are no longer connected
- Next you will drape the Winter Top Shield over the Ninox Hammock Ridgeline
- Now you will connect one side of zippers at a time for your Winter Top Shield
- Make sure ALL zipper heads and pull tabs are facing the way they will be pulled while connecting the Winter Top Shield.
- First, connect the bottom zipper with about 1 inch of teeth connected and hold in place
- Next, run the 2nd zipper on top of that 1st zipper and pull through until you have 3 inches of teeth connected
- Now you can complete the 1st zipper by pulling the remaining teeth (if this is cumbersome you might need to inch the bottom zipper back a few teeth to make it easier)
- You can repeat this process on the other side
Attaching Your Ninox Pole Kit
Attaching Your Ninox Pole Kit
- Add your pole kit poles to the top of the fly by popping the rounded end of the poles into the clear buckles on top of the Ninox Fly. (there is a tube in this bag but it is for repairs not normal set ups)
- Repeat for your second pole (these run parallel and do not cross each other)
- Now you can locate your elastic cords with green hooks and hook them to the Quad Tie Outs located on the Ninox Hammock Insect Shield and to the corners of the Ninox Fly Wing Tips where they connect to their green D-rings. Now Tension these lines to pull the insect shield away from your face.


